Want to see it done? Check out our YouTube video at: http://youtu.be/53HmenfhJxY
Don’t forget to subscribe to our channel for more tips!
Make your documents look more professional with a quick and easy automated Table of Contents in Word 2010.
Step 1: Standardize the Headings in your documents.
Standard Headings
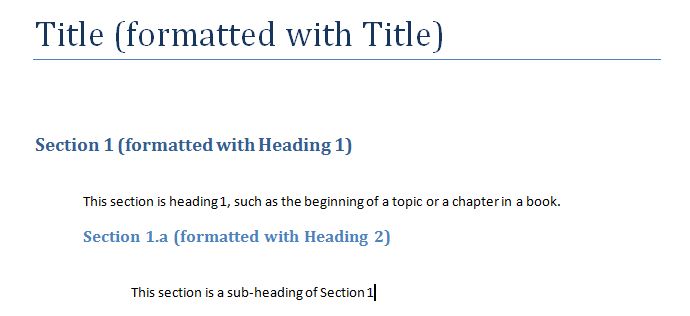
Look for the box above on your Ribbon Bar under Home (Default). As a standard, Choose Title for the title of your document, then Heading 1 as your highest level of organization. Simply highlight the text you want and click the buttons above.
Use Heading 2 for items that will appear grouped with Heading 1 for sub items.

The section of a document above is formatted for our Table of Contents. Let’s see how it looks by inserting a table at the beginning of the document.
Step 2: Inserting a blank page to hold the Table of Contents
Scroll to the top of your document and click the Insert tab on the Ribbon bar. Look for the Blank Page icon and click it.

Inserting the Blank Page
Click the References tab on the Ribbon bar and look for the Table of Contents Icon.

The Table of Contents Icon
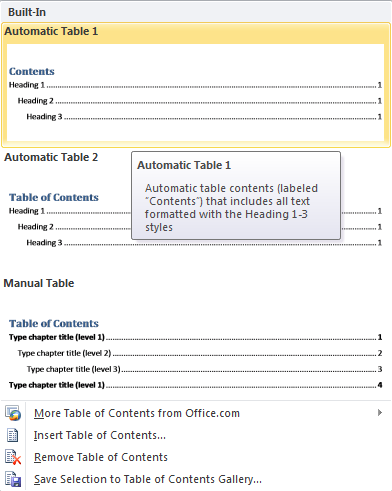
Clicking on the TOC icon gives you a selection screen. The first option is usually fine, but try experimenting with the others.

Once you’ve selected your style, your TOC should be inserted:
Completed Table of Contents
Step 3: Update your TOC as you add content. Right Click on the Table of Contents and select Update Field and the sub-option Update Entire Table.
If you’re looking for help with MS Office training in 1 on 1 or group settings, contact us at (316) 337-5628. We can also provide all your IT service and support needs.
